This tutorial is by Limor Fried and from http://www.ladyada.net/learn/arduino
UNO Driver Installation (Windows)
This is the UNO Arduino procedure.
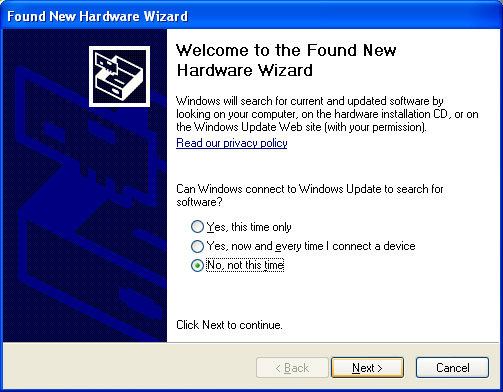
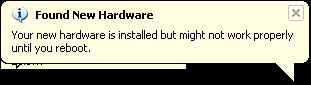
When you plug in the Arduino, you may hear a sound from the computer and a little popup bubble in the bottom right corner of the screen that saysFound New Hardware Arduino UNO.
After a few seconds, the new hardware wizard will start. Select "No not this time" and click Next>
At the next screen, select Install from a list or specific location

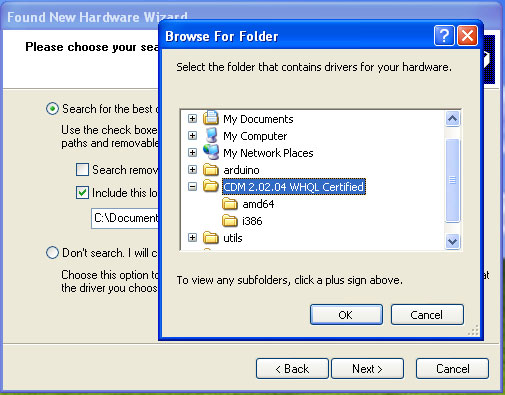
At the next screen make sure Include this location is selected and browse to the Arduino IDE folder and select the drivers folder. Select the folder and click OK.
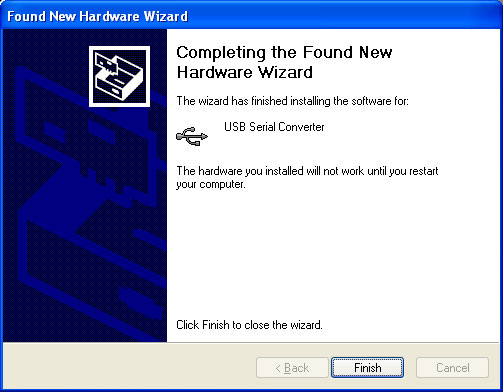
It should copy some files and then come up with this window. Click Finish
Almost immediately, another window will pop up, this time it will be a warning. Click Continue Anyway
And it should complete successfully!

When the computer is done rebooting, make sure the Arduino is plugged in (and the green light is lit). Go to the Device Manager (From the Start Menu, select Settings->Control Panel. Double click on System and select the Hardware tab. Then click on the Device Manager button)
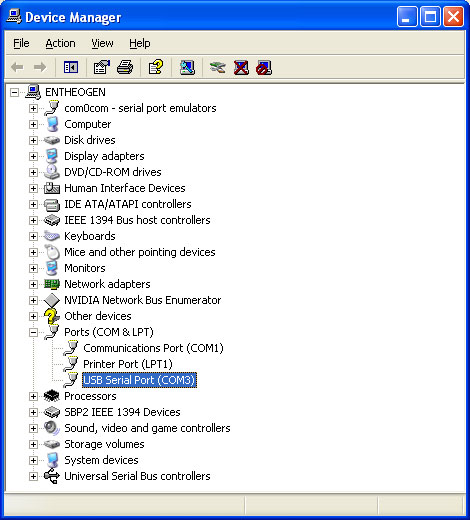
Look for an entry under Ports (COM & LPT) that says USB Serial Port (COM) the COM number may vary but it should be something likeCOM3 or COM4. The COM stands for "communication", and each one has a unique number, known as the COM Port number. In this case the COM Port number is COM3.
If you don't see the COM port verify the Arduino is plugged in
FTDI Driver Installation (Windows)
If you're using an older pre-UNO arduino, you'll have to install the FTDI driver.
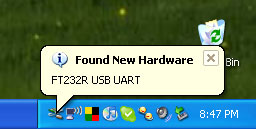
When you plug in the Arduino, you may hear a sound from the computer and a little popup bubble in the bottom right corner of the screen that says:
Found New Hardware FT232R USB UART
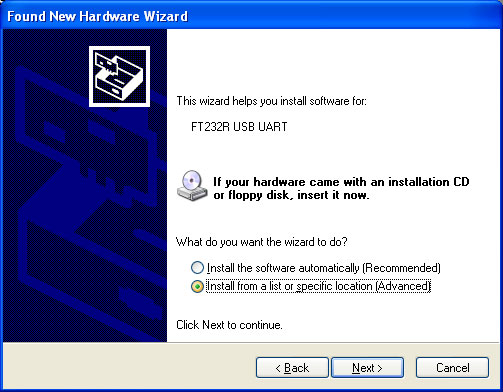
After a few seconds, the new hardware wizard will start. Select "No not this time" and click Next>
At the next screen, select Install from a list or specific location
At the next screen make sure Include this location is selected and browse to the folder that contains the driver you downloaded. Select the folder and click OK
It should copy some files and then come up with this window. Click Finish
Almost immediately, another window will pop up, this time it will say USB Serial Port. As before, click Install from a list or specific location

Browse to the same folder again..
And it should complete successfully!
You may need to reboot the computer.

When the computer is done rebooting, make sure the Arduino is plugged in (and the green light is lit). Go to the Device Manager (From the Start Menu, select Settings->Control Panel. Double click on System and select the Hardware tab. Then click on the Device Manager button)
Look for an entry under Ports (COM & LPT) that says USB Serial Port (COM) the COM number may vary but it should be something likeCOM3 or COM4. The COM stands for "communication", and each one has a unique number, known as the COM Port number. In this case the COM Port number is COM3.
If you don't see the COM port verify the Arduino is plugged in, and check that you installed the VCP FTDI driver.
Arduino Hướng dẫn Bài 0: Driver cài đặt cho Windows
UNO driver cài đặt (Windows)
Đây là các UNO Arduino thủ tục.
Sau một vài giây, các hướng dẫn phần cứng mới sẽ bắt đầu. Chọn "Không có thời gian này" ("No not this time") và nhấn Next>
Tại màn hình tiếp theo, chọn Cài đặt từ một danh sách hoặc vị trí cụ thể (Install from a list or specific location)
Tại màn hình tiếp theo làm cho chắc chắn Bao gồm các vị trí này (Include this location) được lựa chọn và duyệt đến thư mục Arduino IDE và chọn thư mục trình điều khiển. Chọn thư mục và nhấn OK.
Nó sẽ sao chép một số tập tin và sau đó đi lên với cửa sổ này. Nhấp vào Kết thúc (Finish).
Gần như ngay lập tức, một cửa sổ khác sẽ bật lên, lần này nó sẽ là một cảnh báo. Nhấp vào Tiếp tục Dù sao (Continue Anyway)
Và nó phải hoàn tất thành công!
Khi máy tính được thực hiện khởi động lại, hãy chắc chắn Arduino được cắm vào (và ánh sáng màu xanh lá cây được thắp sáng). Tới Device Manager (Từ Start Menu, chọn Settings-> Control Panel Kích đúp vào System và chọn tab Hardware. Sau đó bấm vào nút Device Manager)
Hãy tìm một mục theo Ports (COM & LPT) nói rằng USB Serial Port (COM) số COM có thể khác nhau nhưng nó phải là một cái gì đó likeCOM3 hoặc COM4. COM là viết tắt của "giao tiếp", và một trong từng có một số duy nhất, được gọi là số cổng COM (COM Port number). Trong trường hợp này, số cổng COM là COM3.
Nếu bạn không nhìn thấy cổng COM xác minh Arduino được cắm vào.
Nếu bạn đang sử dụng cũ hơn trước UNO Arduino, bạn sẽ phải cài đặtcác trình điều khiển FTDI.
Khi bạn cắm trong Arduino các, bạn có thể nghe thấy một âm thanh từ máy tính và bật lên một bong bóng nhỏ ở góc dưới cùng bên phải của màn hình nói rằng: Found New Hardware FT232R USB UART
Sau một vài giây, các hướng dẫn phần cứng mới sẽ bắt đầu. Chọn "Không có thời gian này" (No not this time) và nhấn Next>
Tại màn hình tiếp theo, chọn Cài đặt từ một danh sách hoặc vị trí cụ thể (Install from a list or specific location)
Tại màn hình tiếp theo làm cho chắc chắn Bao gồm các vị trí này (Include this location) được lựa chọn và duyệt đến thư mục chứa driver mà bạn đã tải xuống. Chọn thư mục và nhấn OK
Nó sẽ sao chép một số tập tin và sau đó đi lên với cửa sổ này. Nhấp vào Kết thúc (Finish).
Gần như ngay lập tức, một cửa sổ khác sẽ bật lên, lần này nó sẽ nói USB Serial Port. Như trước đây, hãy nhấp vào Cài đặt từ một danh sách hoặc vị trí cụ thể (Install from a list or specific location).
Duyệt đến thư mục cùng một lần nữa.
Và nó phải hoàn tất thành công!
Bạn có thể cần phải khởi động lại máy tính.
Khi máy tính được thực hiện khởi động lại, hãy chắc chắn Arduino được cắm vào (và ánh sáng màu xanh lá cây được thắp sáng). Tới Device Manager (Từ Start Menu, chọn Settings-> Control Panel Kích đúp vào System và chọn tab Hardware. Sau đó bấm vào nút Device Manager)
Hãy tìm một mục theo Ports (COM & LPT) nói rằng USB Serial Port (COM) có thể khác nhau nhưng nó phải là một cái gì đó như COM3 hoặc COM4. COM là viết tắt của "giao tiếp", và một trong từng có một số duy nhất, được gọi là số cổng COM. Trong trường hợp này, số cổng COM là COM3.
Nếu bạn không nhìn thấy cổng COM xác minh Arduino được cắm vào, và kiểm tra xem bạn đã cài đặt trình điều khiển VCP FTDI.
Kết thúc cài đặt trình điều khiển cho Windows.
Arduino Tutorial Lesson 0: FTDI Driver Installation Mac OS X - Arduino Hướng dẫn Bài 0: Driver FTDI Cài đặt Mac OS X
If you have an older, pre-UNO arduino you'll need to install the FTDI drivers. UNO Arduinos do not need a driver!
Open up the driver dmg file
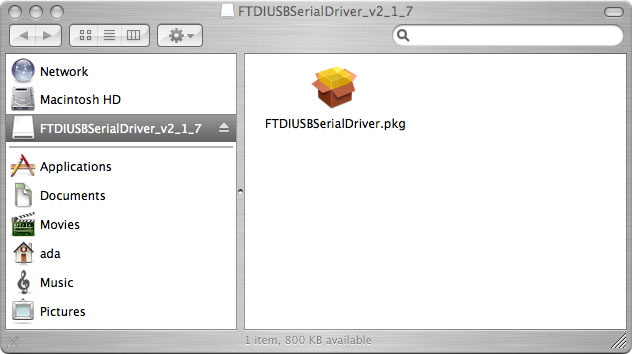
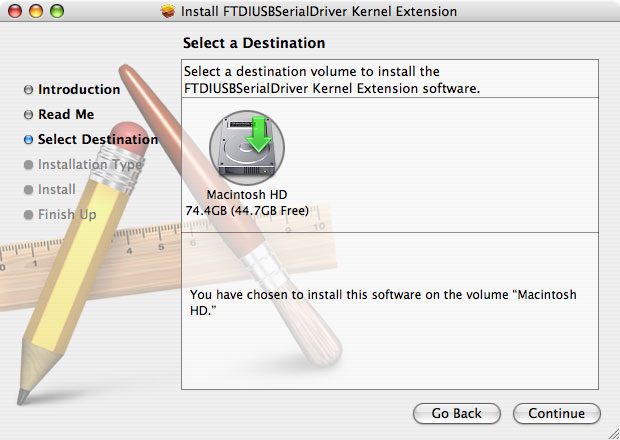
And double click on the driver package, go through all the steps necessary to install the driver

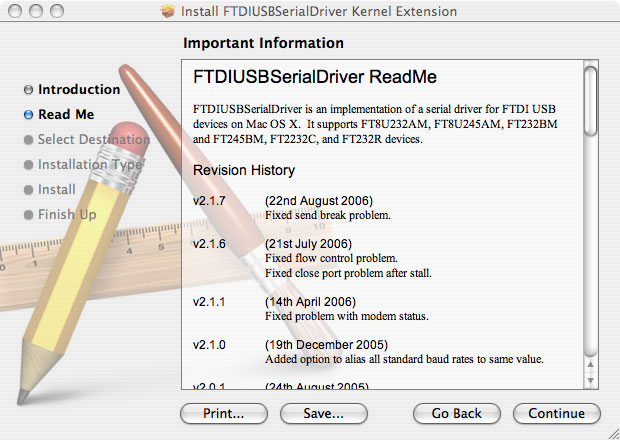
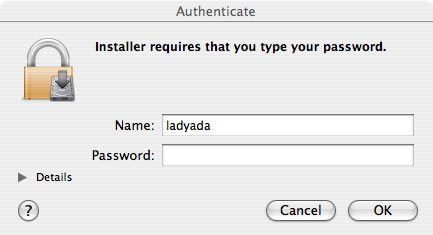
You will need administrative privileges to install the software
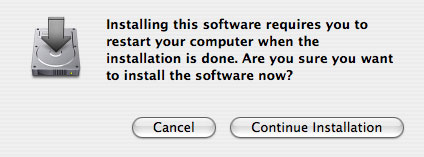
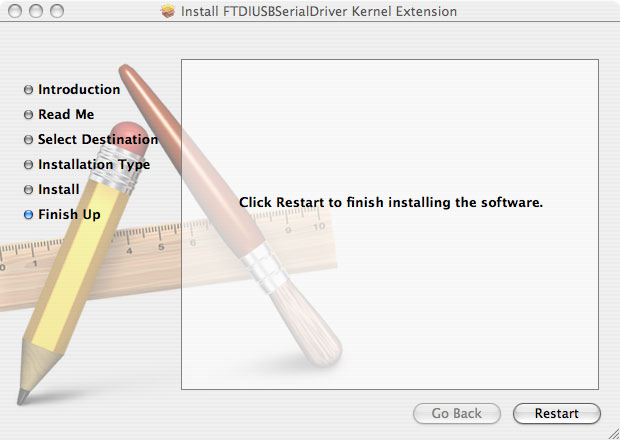
When it's done, restart the computer
Once its rebooted, start up Terminal, located in the Utilities folder

Plug in the Arduino, make sure the green light is on.
In the Terminal window, type in ls /dev/cu.* and/or ls /dev/tty.* which should give the following responses
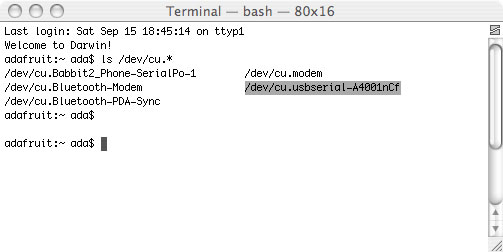
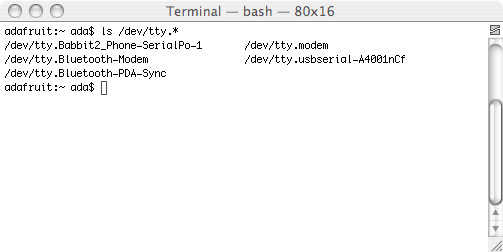
Make sure you see a line with the text /dev/cu.usbserial-xxxxx where the xxx's can be anything. Same for /dev/tty.usbserial-xxxxx. This indicates that the driver installed properly and that the Arduino was found.
If you can't find the text, verify that your Arduino is plugged in, try a different USB port.
You can also try running the Console application, which will possibly give you some information about why its failing.
~
Arduino Hướng dẫn Bài 0: Driver FTDI Cài đặt Mac OS X
Nếu bạn có một một lớn hơn, trước UNO Arduino, bạn sẽ cần phải cài đặt các trình điều khiển FTDI. Các UNO Arduinos không cần một trình điều khiển!
Mở tập tin dmg lái xe
Và kích đúp vào gói trình điều khiển, đi qua tất cả các bước cần thiết để cài đặt các trình điều khiển
Bạn sẽ cần đặc quyền quản trị để cài đặt các phần mềm
Khi thực hiện xong, khởi động lại máy tính
Một khi khởi động lại của nó, khởi động Terminal, nằm trong thư mục Utilities
Cắm Arduino, đảm bảo ánh sáng màu xanh lá cây trên.
Trong cửa sổ Terminal, gõ ls / dev / cu * và / hoặc ls / dev / tty. Mà nên cung cấp cho các phản ứng sau đây
Hãy chắc chắn rằng bạn nhìn thấy một dòng với văn bản xxxxx cu.usbserial / dev / nơi xxx có thể là bất cứ điều gì. Tương tự cho / dev / tty.usbserial-XXXXX. Điều này cho thấy rằng các trình điều khiển được cài đặt đúng cách và Arduino đã được tìm thấy.
Nếu bạn không thể tìm thấy các văn bản, xác minh rằng Arduino của bạn đang được cắm điện, hãy thử một cổng USB khác nhau.
Bạn cũng có thể thử chạy các ứng dụng Console, có thể sẽ cung cấp cho bạn một số thông tin về lý do tại sao của nó không.
Kết thúc cài đặt trình điều khiển cho Mac OS X.
~
Arduino Tutorial Lesson 0: Driver Installation (Linux) - Arduino Hướng dẫn Bài 0: Cài đặt trình điều khiển (Linux)
Linux doesn't have any drivers to install, assuming you're running a v2.6 kernel. These instructions assume you're running Ubuntu. Each linux distribution is different, but the instructions should be basic enough to follow for other distros.
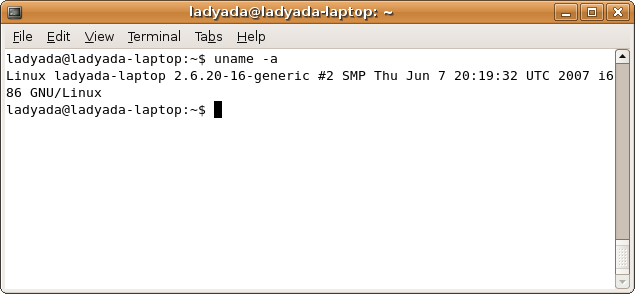
You can verify your kernel version by running uname -a in a terminal window, note that this kernel is version 2.6.20
Sometimes the Linux distribution installs brltty (braille device) which will conflict with the Arduino. You must uninstall brltty! Do so by running
sudo apt-get remove brltty
In a terminal window. If it says it's not installed then thats OK. If you're not running a Debian-derived installation use whatever tool is necessary to verify that you don't have brltty running
Plug in the Arduino, verify that the green LED is lit, and type ls /dev/ttyUSB* into a terminal window, you should see a device file called something like ttyUSB0
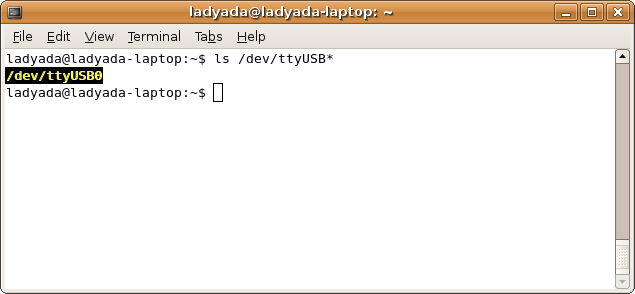
Depending on your Linux distro, it may be /dev/tty/USB0 or /dev/tty.USB etc.
If you can't seem to find it, use dmesg | tail right after plugging in the Arduino and look for hints on where it may put the device file. For example here is says Serial Device converter now attached to ttyUSB0
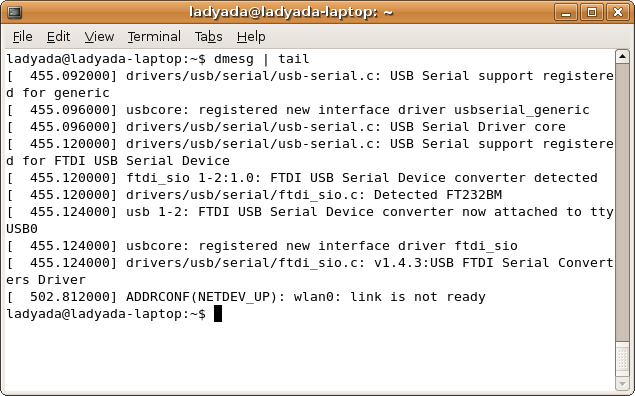
If you see something like this
[ 1900.712000] ftdi_sio 2-10:1.0: FTDI USB Serial Device converter detected
[ 1900.712000] drivers/usb/serial/ftdi_sio.c: Detected FT232BM
[ 1900.712000] usb 2-10: FTDI USB Serial Device converter now attached to ttyUSB0
[ 1901.868000] usb 2-10: usbfs: interface 0 claimed by ftdi_sio while 'brltty' sets config #1
[ 1901.872000] ftdi_sio ttyUSB0: FTDI USB Serial Device converter now disconnected from ttyUSB0
[ 1901.872000] ftdi_sio 2-10:1.0: device disconnected
That means you have not uninstalled brltty and you should try again.
Arduino Hướng dẫn Bài 0: Cài đặt r (Linux)
Linux không có bất kỳ trình điều khiển cài đặt, giả sử bạn đang chạy một hạt nhân v2.6. Những hướng dẫn này giả sử bạn đang chạy Ubuntu. Mỗi phân phối Linux khác nhau, nhưng các hướng dẫn cơ bản đủ để làm theo cho distro khác.
Bạn có thể kiểm tra phiên bản kernel của bạn bằng cách chạy uname-a trong một cửa sổ thiết bị đầu cuối, lưu ý rằng hạt nhân này là phiên bản 2.6.20
Đôi khi các bản phân phối Linux cài đặt brltty (thiết bị chữ nổi) sẽ xung đột với Arduino. Bạn phải gỡ bỏ cài đặt brltty! Làm như vậy bằng cách chạy
sudo apt-get loại bỏ brltty
Trong một cửa sổ thiết bị đầu cuối. Nếu nó nói nó không được cài đặt sau đó thats OK. Nếu bạn không sử dụng cài đặt Debian có nguồn gốc từ công cụ bất cứ điều gì là cần thiết để xác minh rằng bạn không có brltty chạy
Cắm Arduino, xác minh rằng các đèn LED màu xanh lá cây được thắp sáng, và ls loại / dev / ttyUSB* vào một cửa sổ terminal, bạn sẽ thấy một tập tin thiết bị được gọi là một cái gì đó như ttyUSB0
Tùy thuộc vào distro Linux của bạn, nó có thể là /dev/tty/USB0 hoặc /dev/tty.USB.
Nếu bạn dường như không thể tìm thấy nó, sử dụng lệnh dmesg | quyền đuôi sau khi cắm vào Arduino và tìm kiếm gợi ý về nơi mà nó có thể đặt các tập tin thiết bị. Ví dụ ở đây được nối tiếp thiết bị chuyển đổi gắn liền với ttyUSB0
Nếu bạn thấy một cái gì đó như thế này
[1900.712000] ftdi_sio 2-10:1.0: FTDI USB nối tiếp thiết bị chuyển đổi phát hiện
[1900.712000] drivers / usb / serial / ftdi_sio.c: được phát hiện FT232BM
[1900.712000] usb 2-10: FTDI USB nối tiếp thiết bị chuyển đổi để ttyUSB0
[1901.868000] usb 2-10: usbfs: giao diện 0 tuyên bố chủ quyền ftdi_sio trong khi brltty, thiết lập cấu hình # 1
[1901.872000] ftdi_sio ttyUSB0: FTDI USB Serial thiết bị chuyển đổi ngắt kết nối từ ttyUSB0
[1901.872000] ftdi_sio 2-10:1.0: thiết bị ngắt kết nối
Điều đó có nghĩa là bạn đã không gỡ bỏ cài đặt brltty và bạn nên thử một lần nữa.
No comments:
Post a Comment